Carpal Tunnel Pain Relief at Home: What Is Backed by Evidence
Carpal tunnel flares often come from how we hold our wrists or grip objects. The good news is that home care—focused on small, consistent changes—can effectively lower pressure inside the tunnel. It’s not about big workouts; it’s about gentle inputs that restore nerve glide. Learn why these simple adjustments are often enough to reduce irritation and relieve your symptoms.


Why Home Care Works for Many People
Carpal tunnel symptoms often rise when the wrist stays bent, when you grip hard for long periods, or when soft tissues are a little swollen and stiff. Small changes in position and movement can lower pressure inside the carpal tunnel and restore the glide of the median nerve and tendons. The goal is consistent, gentle inputs that reduce irritation, not big workouts.
For the full treatment landscape, including splints, injections, and surgery, see
The Carpal Solution: Carpal Tunnel Treatment Options: Splints, Therapy, Injections and Surgery (P2)
For daily exercises that fit your routine, see:
The Carpal Solution: Carpal Tunnel Exercises: Nerve Glides & Stretching (P4)
Safety Rules Before You Start
- Stop before sharp pain. Mild pulling or a light tingle is acceptable; burning or zapping is not.
- Keep the wrist near neutral. Avoid deep flexion or extension during exercises unless a clinician directs you to do so.
- Short and frequent beats long and hard. Two short sessions daily usually work better than one long session.
- Symptoms should settle within ten minutes after you finish. If not, cut the dose in half.
- If you experience persistent numbness or weakness of the thumb muscles, seek medical advice first.
Evidence-Based Home Strategies, Step by Step

1) Neutral Wrist at Night, Not All Day
Most night symptoms are positional. A soft, neutral wrist splint during sleep can reduce tingling in the first one to two weeks. Keep daytime splinting to a minimum, so you can still stay mobile. Choose a brace that keeps the wrist straight, not bent up or down, and adjust straps to snug, not tight.
Related: How to choose and wear a splint or compare wrist splints and helpful supports.
2) Gentle Nerve and Tendon Glides, Twice a Day
Calm, slow movements help the median nerve and flexor tendons slide better. Start small and keep it comfortable.
Starter set, four to six minutes total
- Warm up, small wrist circles, ten each way.
- Median nerve glide, elbow bent at your side, palm up, slightly extend the wrist until a light forearm stretch, hold one second, return, five slow reps, two sets.
- Tendon glides, move through straight hand, hook fist, straight fist, full fist, five reps total.
- Forearm flexor stretch, elbow straight, pal; up, gently extend the wrist with the other hand, two holds: 10, 15, 20 seconds each.
- Thumb con: roll, to each fingertip five times with the thumb, wrist straight.
3) Pacing and Microbreaks
Every 30 to 45 minutes of hand-intensive work, take a 60 to 90 second reset. Straighten wrists, relax shoulders, perform one light round of tendon glides, then check grip pressure on tools or keyboard. These tiny breaks prevent end-of-day flare-ups.
4) Ergonomic Tuning You Can Do Today
- Keyboard and mouse at elbow height, forearms level, wrists straight.
- Use a light touch on keys and devices; heavy pressing increases pressure.
- For tools, choose larger handles or add a soft grip to reduce pinch force.
- Rotate tasks to avoid long stretches of the exact grip.
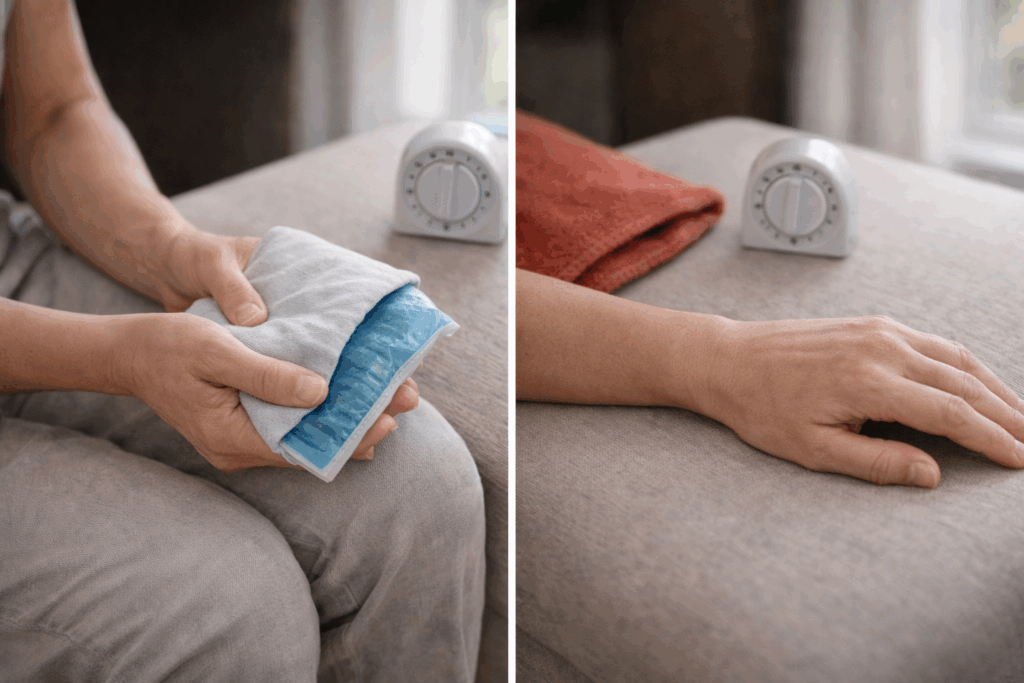
5) Cold and Heat, Use With Intent
- Cold packs can calm a flare; use ten minutes with a thin cloth barrier, then move the wrist gently.
- Gentle heat can ease stiffness; keep it warm, not hot, for five to ten minutes before easy glides.
- If either increases tingling sharply, stop and return to neutral positioning and movement only.
6) Sleep Habits That Protect Your Wrists
- Avoid sleeping with your wrists tucked under your head or pillow.
- Try a small towel roll under the forearm to help maintain a neutral position.
- If you wake with numbness, shake out your hands and straighten your wrists before returning to sleep.
7) Load Management, the Simple Math
Give your tissues time to adapt. If you increase daily keyboard time or introduce a new hobby, raise the time gradually, for example, by 10 to 20% per week, and keep microbreaks in place.
What To Use Sparingly or Skip
- All-day bracing often leads to stiffness and weakens fine control. Save the splint for night during a short trial.
- Aggressive stretching, deep pain, or strong pulling tends to backfire. Keep it light.
- Heavy grip or pinch training during a flare, strengthen later, not during peak irritation.
- Repetitive vibration exposure, for example, long sessions with sanders or trimmers, if you must use them, plan more frequent microbreaks and a lighter grip.
A 14 Day Home Plan You Can Follow
Days 1 to 3
- At night, wear a neutral wrist splint.
- In the morning and evening, do the starter glide set.
- Work, schedule microbreaks every 30 to 45 minutes.
- Record the number of night awakenings and your 30-minute task tolerance.
Days 4 to 7
- Keep the same plan.
- If symptoms settle within ten minutes after sessions, add one extra set of tendon glides in the evening.
- Test gentle heat before a session if stiffness is a barrier.
Days 8 to 10
- If sleep is improving, use the splint on alternate nights.
- Keep nerve glides slow, add a few degrees of motion only if the first week stayed calm.
- Add two short strength drills on three days: soft putty pinch and light rubber-band finger spread, five easy reps each. Stop if symptoms jump.
Days 11 to 14
- Splint only on heavy days or travel days.
- Maintain two short exercise sessions daily.
- Extend flexor stretch holds to twenty seconds if comfortable.
- Recheck task tolerance and sleep. Aim for a 50% drop in night awakenings and longer, more comfortable work blocks.
If you are flat or worse after 10 to 14 days, change the plan rather than pushing harder. Use the comparison guide to review next steps, including therapy, injections, or a surgical opinion if needed.
How To Measure Results and Decide Next Steps
Track these three markers twice a week.
- Night awakenings from hand symptoms target a 50% drop within 2 to 4 weeks.
- Task tolerance: minutes of comfortable typing or a key task before symptoms. Aim for steady increases.
- Function anchors, can you open a jar, hold a mug, or grip a hairbrush without numbness?
If numbers improve, keep going. If they stall for a week, adjust the dose or add a new element from the treatment options page.
Red flags that need medical input
- Constant numbness that does not change with position.
- Noticeable weakness or visible thinning at the base of the thumb.
- Frequent dropping is new.
- Symptoms that do not match the thumb-to-middle-finger pattern.
- No improvement after two to three weeks of calm, consistent home care.
If any of these are present, schedule a clinical review. A precise diagnosis lets you choose the right next step with confidence.