Step One for Carpal Tunnel Relief
The Carpal Solution is extremely easy to use. It is self applied before bedtime in Three Easy Steps.
This application process takes less than thrity seconds once you get it down. This 3 step instruction has been used by over 50,000 people suffering with Carpal Tunnel Syndrome all over the world. Take your time and follow the directions when you first apply it and you will be on your way to Carpal Tunnel Relief using the most effective Carpal Tunnel Treatment available.
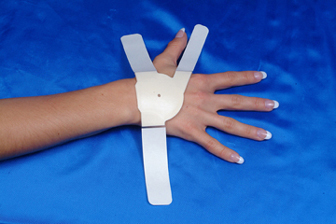
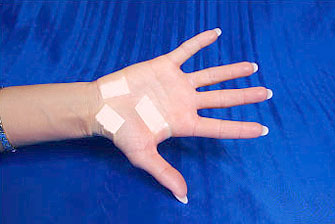
Step 1 – Place the Carpal Solution on the Back of the hand as shown with adhesive side down. Attach 1st strap below little finger securing it on the palm. Tear away excess tape to prevent overlap of straps on palm. Straps are perforated for breath-ability and ease in tearing away excess length. All materials have been carefully selected from medical grade hypoallergenic polymers and adhesives. The Carpal Solution is soft, comfortable and latex free. The Carpal Solution Stretch Tape System was developed by a doctor working with leading medical device designers. The materials of construction all comply with the highest standards of the USFDA. It is patented medical technology and employs the same medical principles as used in other stretch tape medical applications. These devices have been carefully designed to relieve the pressure on the Median Nerve in the Carpal Tunnel. Users also report that they relieve symptoms caused by pressue on the Ulnar Nerve, which runs parallel to the Median Nerve. The adhesive used is the same adhesive as that used in hospitals arround the world for securing IV’s, tubes and other medical items to peoples skin. It has been tested to the highest standards of any adhesive in the world. The Carpal Tunnel Treatment known as the Carpal Solution can be used with full confidence. There is a 97% success rate in relieving Carpal Tunnel Syndrome Symptoms.


Please click here to go to Step Two
